|
Success! I spent some considerable (and frustrating) time debugging my computer and determined that my PC was crashing due to overclocked RAM. It was working fine for over a year, but a recent update to Windows 10, or some other driver update must have thrown a wrench into it's stability. With that distraction out of the way...
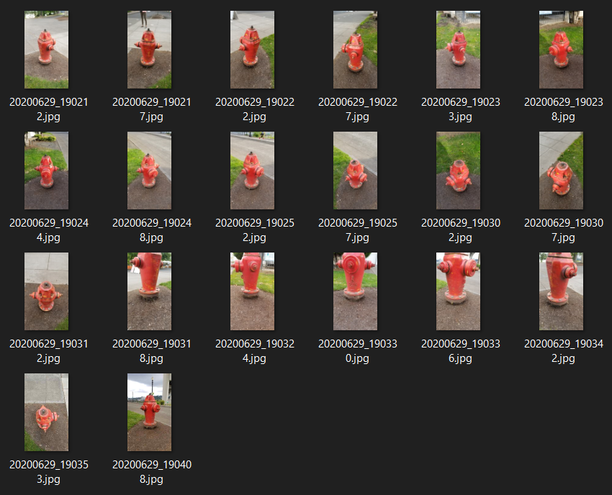
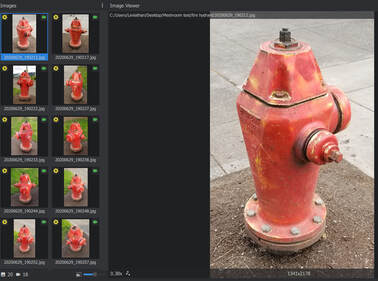
The result is improved compared to my last attempt, which was a splash of red that barely resembled a fire hydrant. This proved to be yet more lessons on picture technique:
Onward and upward... I found a suitable new object for my next test, applying what I've learned thus far. It's is a stone & bronze plaque monument to this mustached colonizer: 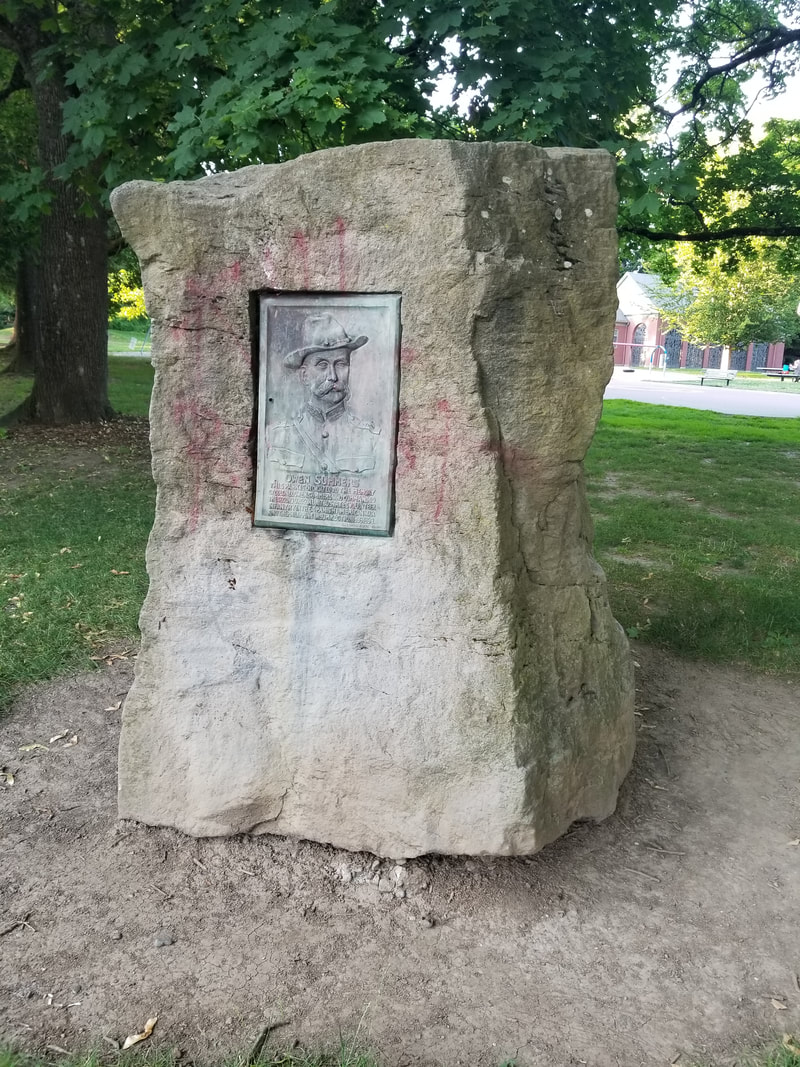 At about 8 ft. tall in an open grassy area, it is accessible from all angles. And my visit was during an overcast day. Despite the clouds scattering most of the light, it was late in the day, and the sun primarily came from one low angle. So, it still has a dark side. Not bad though. This time, I found that I could increase my smartphone's megapixel/resolution by changing the picture ratio from 16:9 to 3:4. That helps. I took 32 pictures at standing height, moving 360 degrees around the stone. Then took 18 more from various angles trying to get the top part which I thought might be a problem. 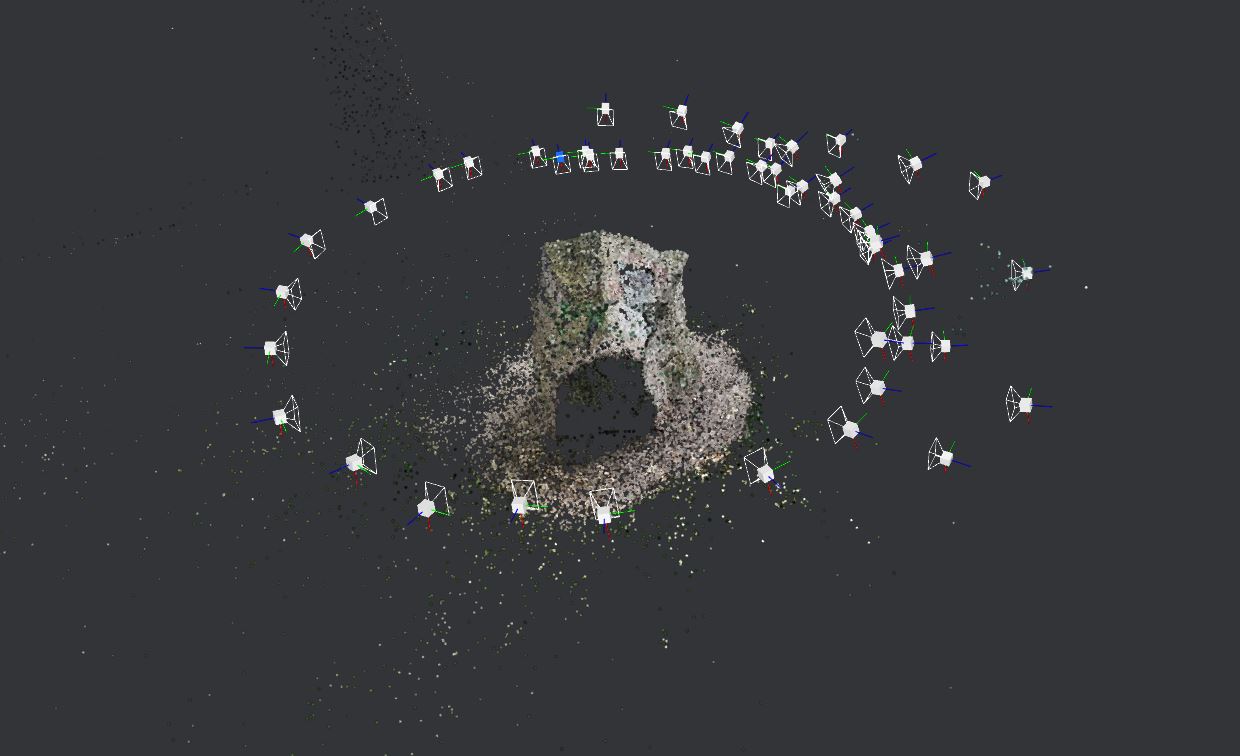 It's cool to see it calculate each pictures perspective location to generate the point cloud. Turned out pretty well. With this sample, I thought it was time to move on to cleaning up the mesh in Blender, and test out a render. It imports nicely, and didn't take much effort to trim it down. 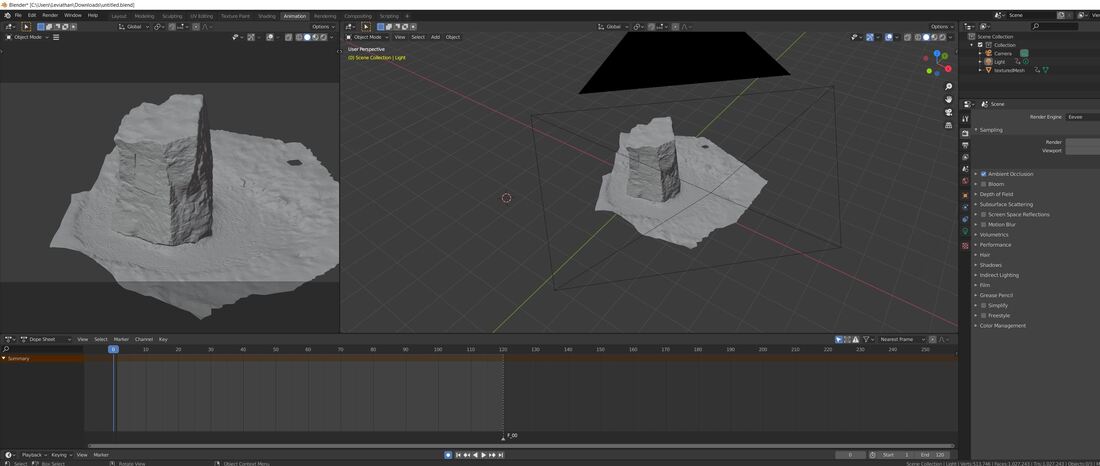 Blender took a bit of adjusting to, but after about an hour of playing around I was able to get the basics down. In the past, I primarily rendered in an isometric view. My first step was to get the camera configured for that view. Secondly, I wanted to see how lighting would cast on the mesh, and how to set key frames. I saved a short render: When I started the 3d scanning samples, it was my hope that I could use it to minimize production time from complex textured mesh assets. It's no doubt that this will be a new tool in my media creation arsenal. It has it's limitations, but for static environment generation it's very useful. Also this is relatively new technology. I have no doubts that it will advance by leaps and bounds and become increasingly accessible. Next up, I'll be moving on to experimenting with Blender more in depth and get accustomed to the user interface and features.
0 Comments
Since my last enthusiastic photogrammetry post, I moved on to trying some more Meshroom tests. These additional samples revealed some limitation and obstacles that I'll need to learn more about and overcome. The first "rock" test turned out pretty well because I unintentionally adhered to some of the ideal conditions for photogrammetry.
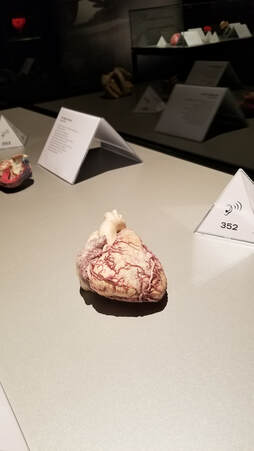
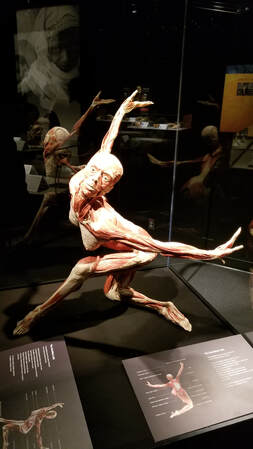
Secondly, Meshlab is crashing my PC. Complete blue screen of death. I suspect it has something to do with with overclocking my CPU, the stock overclock of my GPU, or memory overclocking. I played around with these settings with mixed results about a year ago and never learned enough about what I was doing to effectively tune everything just right for stability. I was regularly crashing PC games back then, then got to a point where it rarely crashed, but never perfect. There isn't a great deal of Meshroom help that I can easily find related to this other than references to removing overclock to GPU for stability. Another area to improve will be learning more about my smartphone's camera. I usually just a point & shoot. I believe there is likely more settings and features available that can result in better photos. More Tests A couple days ago I visited a bodyworlds exhibit. It was a fun trip, and had some really interesting showcases. You can't leave something like that without feeling a sense of mortality and how fragile and complex beings we are. Below are some more 3D photo scanning samples I took at the exhibit, and on a walk afterward nearby.
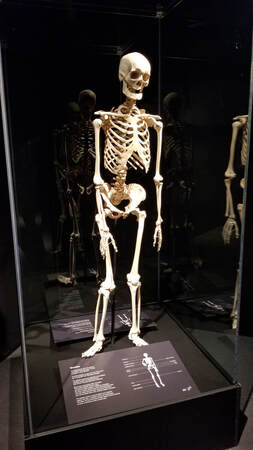
Skeleton & Brain + Arteries - Again, I had really low expectations with these, but was still curious how Meshroom would handle reconstructing complex geometry with glass reflections and fewer photo angles.
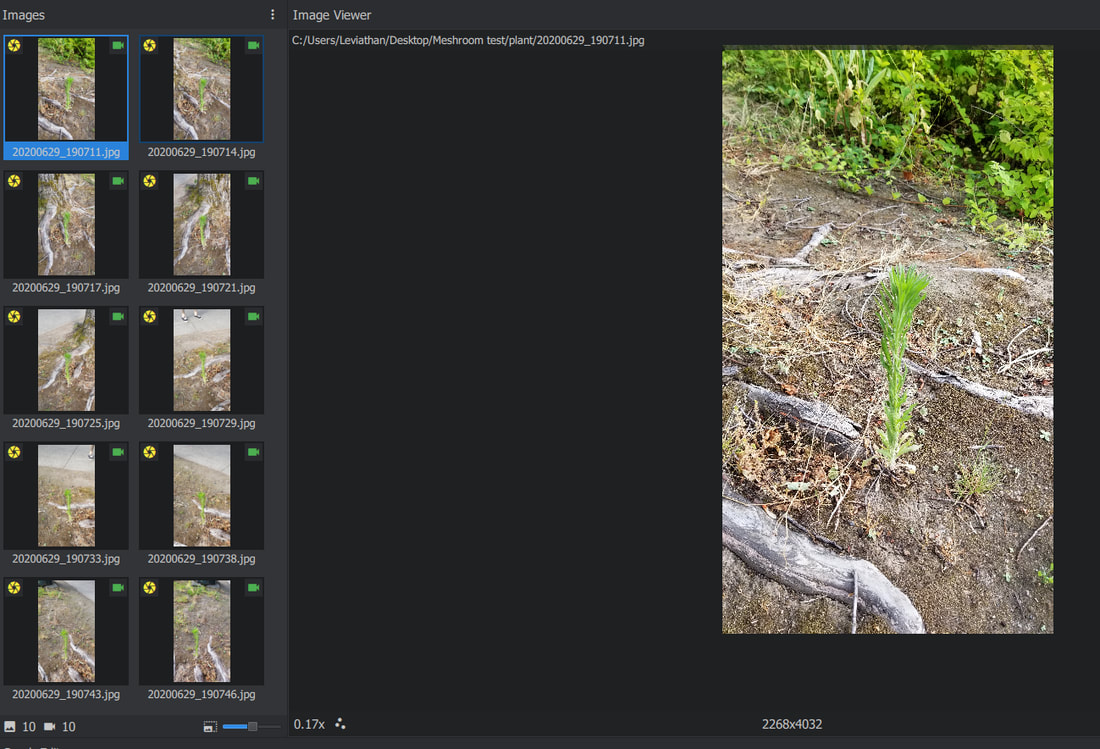
Fire Hydrant, Small Plant (and more not shown) - With these, I took more time to find suitable samples with great lighting, and matte surfaces. I also took several more photos than I did with my first rock test. As well as taking 2 or 3 different 360 degree sweeps, at varying angles. I thought they would yield some high quality geometry. However, I ended up with pretty bad results. The majority of the time, it just caused my computer to crash. Note: The plant I was trying to capture was completely omitted from my generated mesh.
I'll preface my first post with what I have been up to recently as it relates to creative endeavors. Which is, delving back into the world of digital graphics and design after a decade long break. The first part of the journey has been checking out the latest versions of 3D graphics programs and the respective advancements made to the most popular programs, plugins, and tools. This has included watching a number of tutorial and demo videos, reading articles, loading up old 3d models & scenes, and generally re-acquainting myself with the whole field. Coincidentally, it seems that the primary software I used in the past (Lightwave 3D) actually disappeared for several years as well, only to recently re-emerge. A few noteworthy developments (among numerous others) since my absence has been sculpting and photogrammetry (or 3d photo scanning).
Like anyone else, I want to achieve highest quantity & quality results with minimal upfront cost of time & money when working on any project. This means that initially I'll stick with free and opensource tools whenever possible (GIMP, Blender, Audacity to name a few). As well as utilizing free and/or cheap model, animation, textures & sound assets if available. So long as they have acceptable licensing, and aren't overly generic. Now, the approach described above naturally leads to photogrammetry. This technology has advanced far enough that the barrier to entry is very minimal. You can get acceptable results with just a smart phone, and free to download software. The software I used for my "Quick Test" below is Meshlab. The Test This weekend I went on a camping trip with my girlfriend. During an afternoon hike I paused for a couple minutes to take 9 pictures of a rock along the trail that looked like it would be suitable for a test. Just my smartphone, nothing fancy. This would simply tell me what kind of result I could get, and if it would be usable. After getting home I gave it a try... 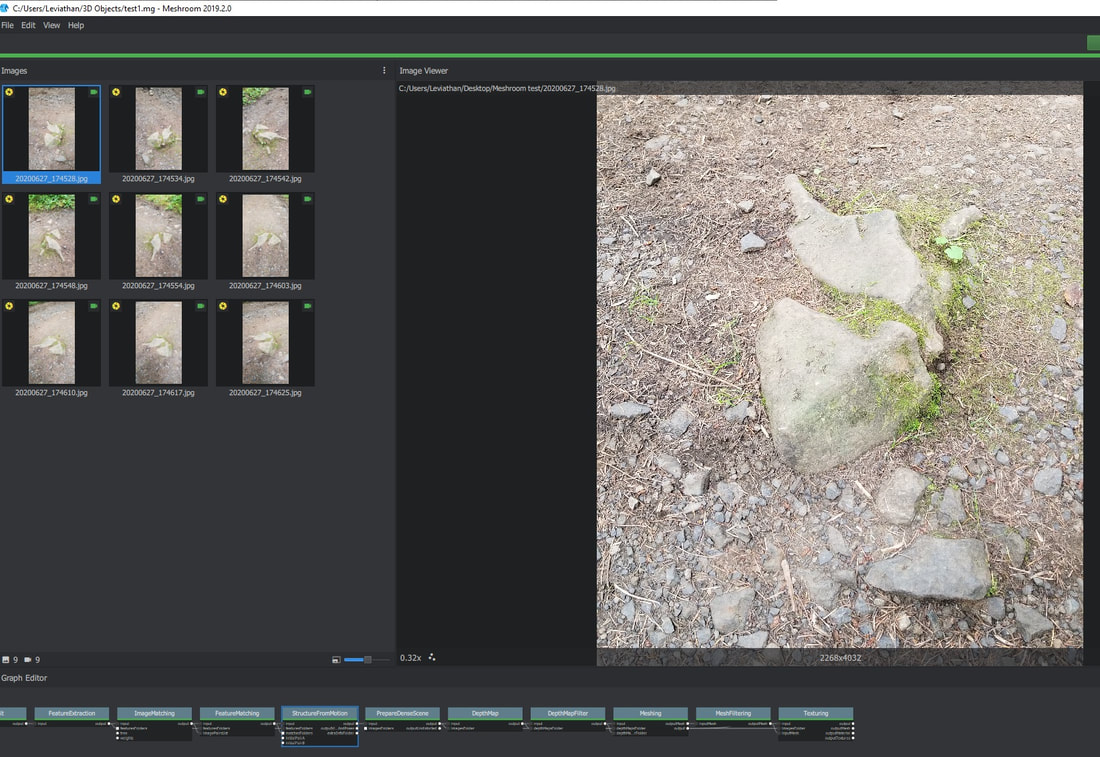 Loaded the program up, clicked & dragged in a set of pics. Then clicked "Start". Using all the preset default nodes, it took about 5 minutes to generate the below mesh and texture. So, the result is... a rock. But not just any rock. The kicker: it's complex geometry with a high resolution photo texture, that took very little time to generate (<10min total for this raw mesh). The implication is that high detail, static scene assets can be generated much easier by using this method (interesting example here shows it cut the production time literally in half). AND, you get to leave behind the mundane clickity clacks of keyboard and mouse. You get to go outside and use nature and structures as inspiration. |